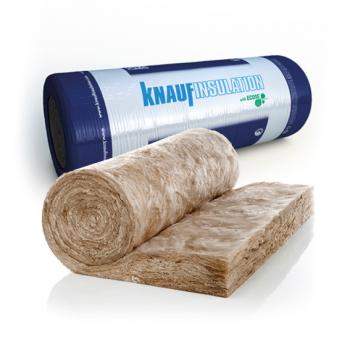
Knauf Earthwool Acoustic Roll
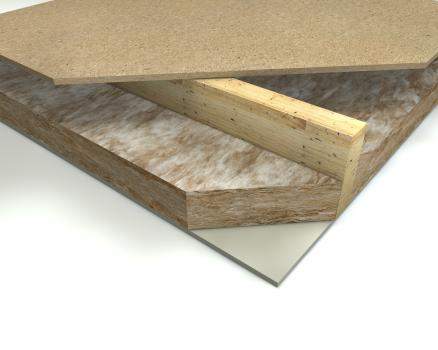
Knauf Earthwool Acoustic Roll is odourless, non-hygroscopic and rot proof meaning vermin will not be sustained and the product will not have any effects on fungi, bacteria or mould and its classification as Zero ODP and Zero GWP means it has a low impact on the environment. Earthwool acoustic rolls are 1200mm wide and ready to cut to produce three – 400mm wide rolls, two – 600mm wide roll or one 1200mm wide roll with a minimum density of 10Kg/m3. Designed to fit between joists and studs at 400mm and 600mm centres to improve sound insulation of:
- Separating walls and floors
- Internal walls and floors
- Timber and metal stud partitions
If you’re looking for something similar an alternative to Knauf Earthwool acoustic roll insulation is the Isover acoustic partition roll and can be found in the below link.
Isover Acoustic Partition Roll
Please see below our Knauf Insulation acoustic roll datasheet and safety regulations.
Safety:
- Generic BRE Green Guide Rating A+
- A1 Euroclass Fire Rating
Earthwool Acoustic Roll is manufactured in accordance with:
- BS EN 13162, EN 16001 Energy Management Systems
- OHSAS 18001 Occupational Health and Safety Management Systems
- ISO 14001 Environmental Management Systems
- ISO 9001 Quality Management Systems, as certified by Bureau Veritas
More Information:
Roll Length : 25mm (26.4m2), 50mm (16.2m2), 75mm (17.4m2), 100mm (12.36m2)
- Thermal conductivity: 0.032 W/mK, 0.035 W/mK, 0.039 W/mK
- Thickness: 25mm,50mm,75mm,100mm
- Width: 600mm
- Fire-resistant: Yes
- Sound-proof: Yes
- Glass Mineral Wool

Knauf Earthwool Acoustic Roll Installation Guide
Before you begin:
Gloves can be handy when laying and fitting loft roll but are not essential.
Check for any heavy-duty electrical wiring before you lay the roll. Any heavy-duty electrical wiring should always be kept above the insulation to avoid the possibility of overheating. The lower amp lighting cable should be ok to leave as is.
Step 1:
To start, ensure your timber battens or studs are in place and have a gap of 600mm or 400mm to fit the acoustic roll.
Measure the height of the partition and then cut the insulation to the corresponding length.
Step 2:
Place the insulation into the top of the partition and fill the partition to the floor by pushing the roll in at the edges to get a snug fit but don’t push down too much – remember you want as much air as possible to be trapped in the insulation.
If you have difficulty pressing the material down in the harder to reach corners/ areas, a ladder or long object such as a broomstick can be a handy tall to help to press the loft roll down.
When the roll runs out, simply start a new role and put the two ends together.
When you need to cut the roll, mark the length where you need to cut. Grip the roll between two boards (one above and one below to hold the role in place) or lay on a solid surface and press down with a ruler and cut with a Stanley knife.
Step 3:
If the partition is at an angle, simply measure where the angle will be on the acoustic roll and using a ruler, then carefully cut the insulation to the correct angle using a knife. Then place the cut insulation into the partition and push into place
- If fitting the roll into a ceiling, use support netting to keep in place and stop the insulation from falling. Simply fit the roll into the wooden joists and then staple the net to the wooden joist as you go to keep the roll in place.
- If fitting in a loft – once you have filled between the joists you now need to lay another layer across the top of the joists to avoid heat loss – Remember you are looking for a combined thickness of over 270mm so for the top layer a minimum of 200mm thickness is recommended. The thicker the better to provide the best insulation to the house/ commercial space, maximise savings and keep energy bills low.